Are you really good at shooting and want to get even better? It can be fun and difficult to make your own recurve bow parts, which will lead to a unique bow that works well. But you should be careful and pay close attention to every detail when you do this job.
Starting with choosing the right materials and ending with finishing the project, this step-by-step guide will show you how to make recurve bow limbs. Whether you’ve worked with wood before or this is your first time, this guide will help you make the best recurve bow parts for your needs.
A Detailed Chart of How to Make Recurve Bow Limbs Materials and Tools
| Step | Task | Materials | Tools |
|---|---|---|---|
| 1 | Choose wood for the core of the limbs | Maple, hickory, bamboo | None |
| 2 | Cut the wood into rough dimensions | Rough-cut wood stock | Jig saw or band saw, measuring tape |
| 3 | Glue the wood pieces together | Wood glue | Clamps, rubber bands |
| 4 | Shape the rough blank to the desired profile | Wood rasp, coarse sandpaper | Hand plane or belt sander, measuring tools |
| 5 | Add fiberglass or carbon fiber to the core | Fiberglass cloth or tape, epoxy resin, carbon fiber cloth (optional) | Heat gun, mixing cups, brushes |
| 6 | Shape the limbs to their final dimensions | Fine sandpaper | Hand plane or belt sander, measuring tools |
| 7 | Sand the limbs to a smooth finish | Fine sandpaper | Sanding block or orbital sander |
| 8 | Apply a finish to protect the wood and fiberglass | Varnish, polyurethane, or other sealants | Paintbrush, gloves, mask |
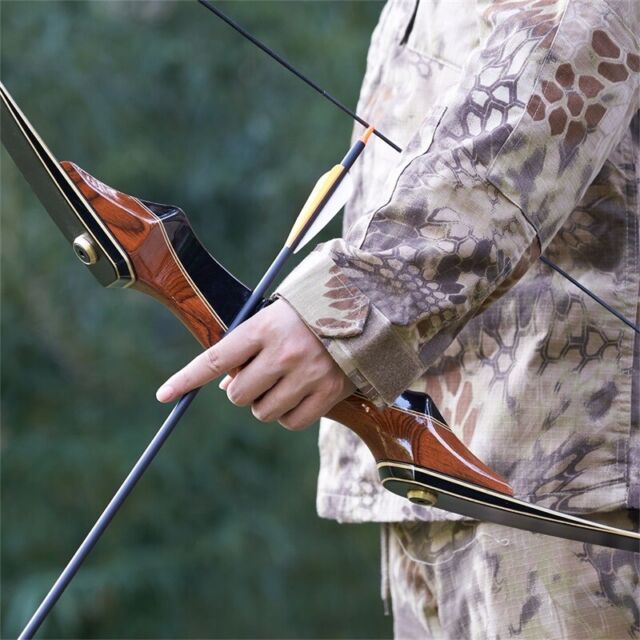
If You Need A completed New Recurve Bow for Hunting, Check This Out
How to Make High-Quality Recurve Bow Limbs
Following this guide will help you make a great recurve bow. You can either make a new recurve bow from scratch or use an old limb to make a new one.
This type of bow is great for shooters who want something more comfy and simple to use than a regular bow.
They look cool, too! Before you go on your trip with this kind of gear, you should know the same things you need to know about any other gear:
Materials
The materials you will need are:
- A woodworking saw
- Sandpaper (220-grit)
- Wood glue primer/sealer, or epoxy resin. If you’re using epoxy, you can also use a brush to spread it on your bow limbs instead of using an aerosol can. This will make it easier for your limbs to dry properly after application.
If you plan to use wood glue, then you will want to make sure that the surfaces of your bow limbs are clean and dry.
Step 1: Preparing the Limbs
To start, you’ll need to make sure that your limbs are dry. If they’re not, then use a sharp knife to cut them off at the end of their natural curve. Once this is done, you can use sandpaper or a file to smooth out any rough edges left over after cutting and burning.
Next up is attaching the limb to your bowstring by burning through the limbs with a wood burning tool (I used epoxy glue).
Step 2: Cut a piece of wood to the desired length.
You will need a piece of wood that is long enough to wrap around your bow’s handle. To measure this, cut the limb from a 2×4 or 3×6 piece of lumber and measure it from one end to the other with a measuring tape.
You should also make sure that it is not too wide or narrow; if you find yourself with an unusable limb, consider making another one out of another piece of wood instead!
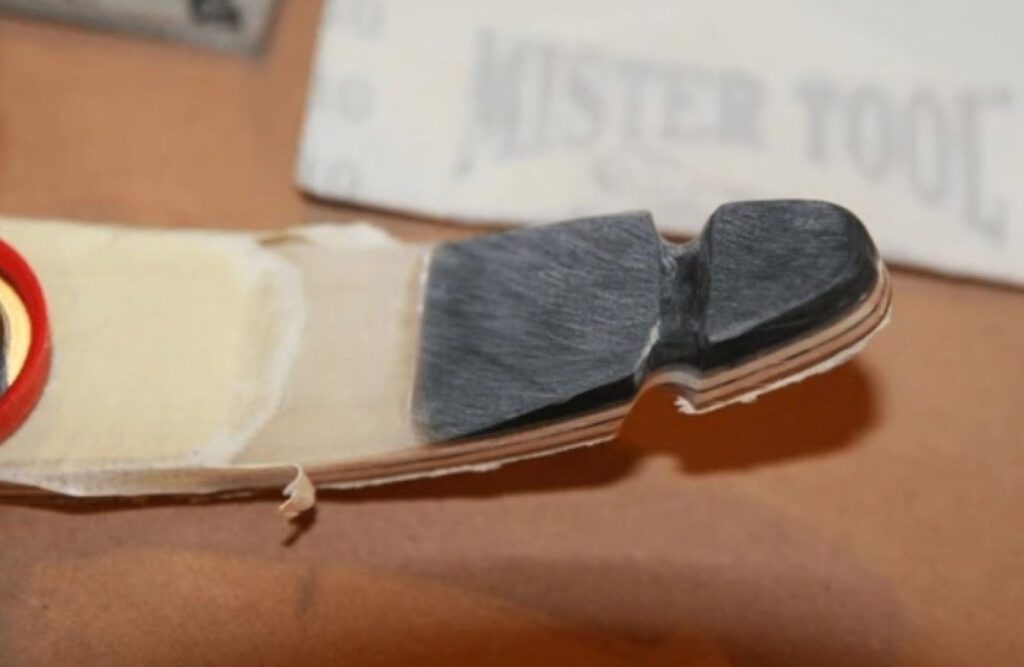
Step 3: Sand the wood surface to remove any sharp edges.
Before you can make recurve bow parts, you need to sand them. So that the glue can stick well, you should make sure that the wood’s surface is flat and smooth.
For this job, sandpaper works best, but if you don’t have any of those tools, you can use a sander or grinding block instead. You can use a polishing sponge or stick instead of your hands if you like the old-fashioned way of doing things, but it might not work very well.
You’ll need to keep yourself away from the wood that you’re shaping into its parts. An acrylic sheet or a plastic sheet should work fine; just make sure they’re big enough that you can fit both sides together at the same time without any gaps, so it doesn’t matter which side you glue down first.
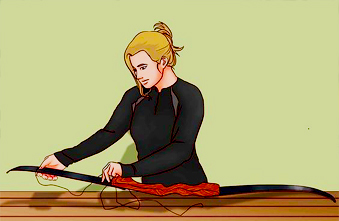
Step 4: Drilling Holes and Attaching Strings
- Drill a hole in the limb.
- Attach your string to the bowstring, then attach it to the limb itself. You will want to make sure that your string is long enough so that when you draw back on it, there is no slack between your fingers and bowstring (or you could end up with an arrow flying off into space!). If you haven’t already done this step, now would be a good time!
Now it’s time to take aim. You will want to hold your bow out with one hand while you pull back on the string with the other.
If you are right-handed, this will mean holding the bow in your left hand and drawing back on the string with your right; if you are left-handed, it will be vice versa.
Step 5: Paint or stain your limb using a natural dye process, if possible.
Now that you have your limb ready to be painted, it’s time to stain or paint your wood. You can use a natural dye process if possible, but it’s not always possible.
If you’re not able to get to a natural dye stage in the process and need to use a more visible finish, then go ahead and do so!
Step 6: Cut a slit in the limbs using an old pair of scissors.
To cut the limbs, you will want to cut a slit in the limbs at an angle. You can do this by cutting them at any slant or angle, but I recommend cutting them at a 45-degree angle.
If you want more information on how exactly to make your bow limbs from scratch and what materials are best for this project then check out my article “How To Make Recurve Bow Limbs For Archery”.
Step 7: Make an incision along one side of the limb until you reach your desired angle.
To start making your new limb, cut along one side of the old one until you get to the position you want. Using a saw or knife, cut through both ends of the bow’s limb until they meet at a good angle.
Use a thin piece of wood from inside and outside those two pieces after you’ve made the cuts, but not before. This will help keep everything straight and will also make it easier to line up when you glue later on!
After cutting off some extra wood from around the base where it meets itself again after being split in half, figure out how far apart those two points should be so that we can finally glue it together correctly before adding more layers or cuts below to cover up any mistakes.

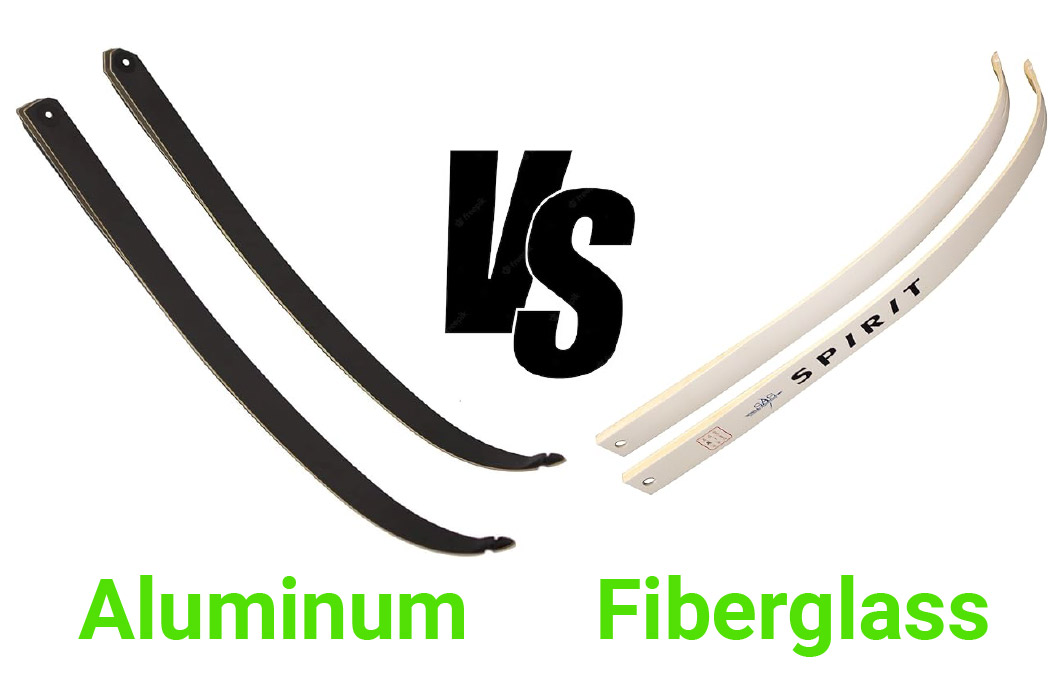
A Look at the Pros and Cons of Aluminum and Fiberglass Recurve Bow Limbs
What is the best way to shape the bow limbs and tiller the recurve?
When it comes to shaping the bow limbs and tillering a recurve bow, there are several important factors to consider. These include the materials used, the design of the bow, and the specific needs of the archer. With that in mind, here are some key tips for shaping the bow limbs and tillering the recurve:
Start with quality materials:
The quality of the materials you use will have a significant impact on the final product. Choose high-quality wood or carbon fiber that is durable and can withstand the stress of regular use.
Understand the design of the bow:
Before you start shaping the bow limbs, it’s important to understand the design of the bow. Recurve bows are designed to bend inward when drawn back, so it’s important to shape the limbs in a way that allows for this movement.
Use a tillering string:
A tillering string is a special string that helps you test the bow’s flexibility as you shape it. This tool will help you determine if the bow is balanced and if the limbs are bending evenly.
Start slowly:
When shaping the bow limbs, it’s important to take your time and proceed slowly. Make small adjustments at first to avoid over-correcting and damaging the bow.
Check for balance:
As you shape the limbs, it’s important to check for balance. The bow should feel evenly weighted in your hand and the limbs should flex equally.
Test the bow:
Once you’ve finished shaping and tillering the bow limbs, it’s time to test the bow. String the bow and shoot a few arrows to check its performance.
If the arrows are flying straight and true, then you’ve successfully created a set of recurve bow limbs that will enhance your archery experience.
How much weight should I expect from a set of recurve bow limbs?
It is important to consider the weight of the limbs in order to ensure that they are suitable for your needs. The weight of the limbs will have a significant impact on the performance of the bow, as well as the comfort and ease of use for the archer.
Factors Affecting Limb Weight and What You Need to Know
The weight of recurve bow limbs can vary depending on a number of factors, including the material they are made from, the length of the limbs, and the draw weight of the bow.
Generally speaking, recurve bow limbs can weigh anywhere from 20 to 60 pounds, with the most common weight range being between 25 and 45 pounds.
Choosing the Right Recurve Bow Limb Weight
It is essential to choose the right weight for your needs, as using limbs that are too heavy can result in fatigue and injury, while using limbs that are too light can limit the power and accuracy of the bow.
It is recommended that beginners start with a lower weight limb, around 20-25 pounds, and gradually increase the weight as they become more experienced and stronger.
Factors to Consider and Expert Advice for Optimal Performance
Ultimately, the weight of the limbs should be chosen based on factors such as the draw weight of the bow, the archer’s strength and experience level, and the type of shooting they will be doing.
Consulting with a knowledgeable salesperson or experienced archer can also be helpful in making the right choice.
With careful consideration and attention to detail, selecting the right recurve bow limbs can enhance your shooting experience and help you achieve greater accuracy and success.
Conclusion
For shooting, making your own recurve bow parts is hard work that pays off in the end. If you have the right materials, tools, and know-how, you can make your own custom bow that will help you get better at the sport and enjoy it more. Remember to take your time, be careful, and ask for help or direction if you need it.
No matter how much experience you have as a shooter, making your own gear is a useful and rewarding skill to learn. So why not give it a shot and see where your skill and imagination can take you? Have fun shooting!
Here are some FAQ’s about How to make recurve bow limbs for archery:
Can I make recurve bow limbs without any prior woodworking experience?
It’s possible, but it’s recommended to have some basic woodworking skills before attempting to make recurve bow limbs.
Can I customize the weight and length of my recurve bow limbs?
Yes, one of the benefits of making your own recurve bow limbs is that you can tailor them to your specific needs and preferences.
Can I use carbon fiber instead of fiberglass?
Yes, carbon fiber can be used instead of fiberglass. Carbon fiber is stronger and lighter than fiberglass, but it is also more expensive.
Is it safe to make my own recurve bow limbs?
Yes, it is safe to make your own recurve bow limbs as long as you follow proper safety precautions. Be sure to wear protective gear, such as gloves, goggles, and a respirator, and work in a well-ventilated area.
How long does it take to make recurve bow limbs?
The time it takes to make recurve bow limbs can vary depending on your skill level, the complexity of the design, and the availability of materials and tools. It can take anywhere from a few days to several weeks to complete the process.
Can I use my homemade recurve bow limbs for hunting?
A: It is important to ensure that your homemade bow limbs are safe and reliable before using them for hunting. It is recommended to have them tested by a professional archer or bowyer before using them in the field.
How do I maintain my recurve bow limbs?
To maintain your recurve bow limbs, you should store them in a dry and cool place, avoid exposing them to extreme temperatures or humidity, and periodically inspect them for any signs of damage or wear.

I loved as much as you will receive carried out right here The sketch is attractive your authored material stylish nonetheless you command get got an impatience over that you wish be delivering the following unwell unquestionably come more formerly again since exactly the same nearly a lot often inside case you shield this hike