If you’re a fan of archery or simply enjoy woodworking, making your own recurve bow riser can be a satisfying and rewarding experience.
While it may seem like a complex task, with the right tools and some patience, creating a custom recurve bow riser can be a fun and engaging project.
In this step-by-step guide, we’ll walk you through the entire process, from designing the riser and gathering materials to making the riser, finishing it, and attaching the limbs.

By the end of this guide, you’ll have all the knowledge and skills you need to create a beautiful and functional recurve bow riser that is uniquely yours.
So let’s get started!
Make a Recurve Bow Riser: A Step-by-Step Guide
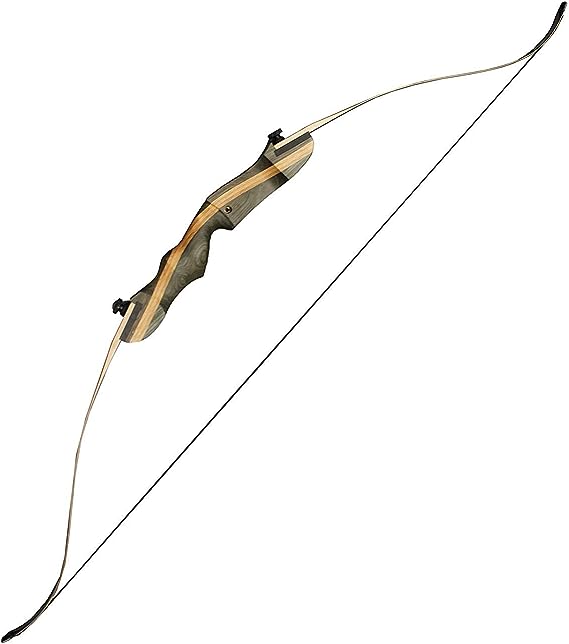
Crafting a recurve bow riser requires patience, attention to detail, and knowledge of woodworking. The best recurve bow riser is the foundation of the bow, upon which the limbs and string are attached.
The following steps will guide you through the process of making a recurve bow riser:
To Make a Recurve Bow Riser, You Will Need The Following Materials and Tools:
| Materials | Tools |
|---|---|
| Hardwood board (maple, hickory, or walnut) | Table saw |
| Limb bolts (purchased or homemade) | Band saw |
| Wood glue | Drill press |
| Sandpaper (various grits) | Power drill |
| Finish (such as polyurethane or lacquer) | Hand saw |
| Bowstring | Chisels |
| Accessory hardware (such as a rest or stabilizer) | Hand drill |
| Tape measure | Clamps |
| Pencil or marker | Files and rasps |
| Square or straightedge | Sanding block |
While you may not need all of these tools and materials depending on your specific design and woodworking skill level, we provide a good starting point for what you’ll need to create a functional and aesthetically pleasing recurve bow riser.
Step 1: Designing The Riser
Designing the recurve bow riser is the first step in making a high-quality bow. The design of the riser must take into account various factors, such as the archer’s strength and skill level, the intended use of the bow, and the type of wood being used.
Select the wood
Choose a suitable piece of hardwood for the riser. Common types of hardwood used for recurve bow risers include maple, walnut, and cherry. The wood should be free of knots and cracks, as these can weaken the riser over time.
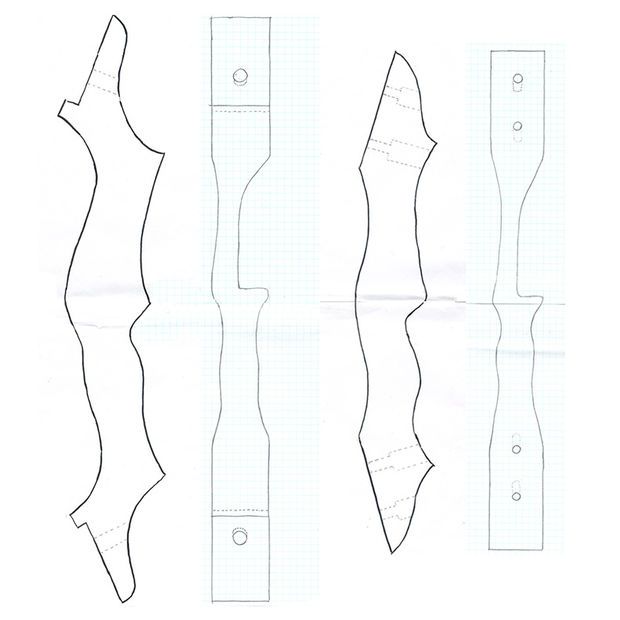
Sketching the design
The first step in designing the recurve bow riser is to create a sketch of the bow. The sketch should include the dimensions of the riser, the shape of the handle, and the placement of the limbs.
The sketch should also include the placement of any accessories, such as a bow sight or stabilizer.
Measurements and calculations
Once you have a sketch of the recurve bow riser, you will need to take measurements and perform calculations to determine the exact dimensions of the riser.
The length of the riser will depend on the archer’s draw length and the type of bow being made. The width of the riser should be wide enough to accommodate the limbs and provide a comfortable grip for the archer.
The angle of the limbs should also be taken into account when designing the riser. The angle of the limbs affects the overall performance of the bow, so it is important to get this right.
The angle of the limbs can be calculated using a formula based on the archer’s draw weight and the type of bow being made.
Step 2: Preparing The Materials
Draw the design.
Draw the design of the riser on the block of wood. Use a ruler and a compass to ensure that the measurements are accurate. The design should include the handle, the arrow rest, and the limb pockets.
Cut the riser.
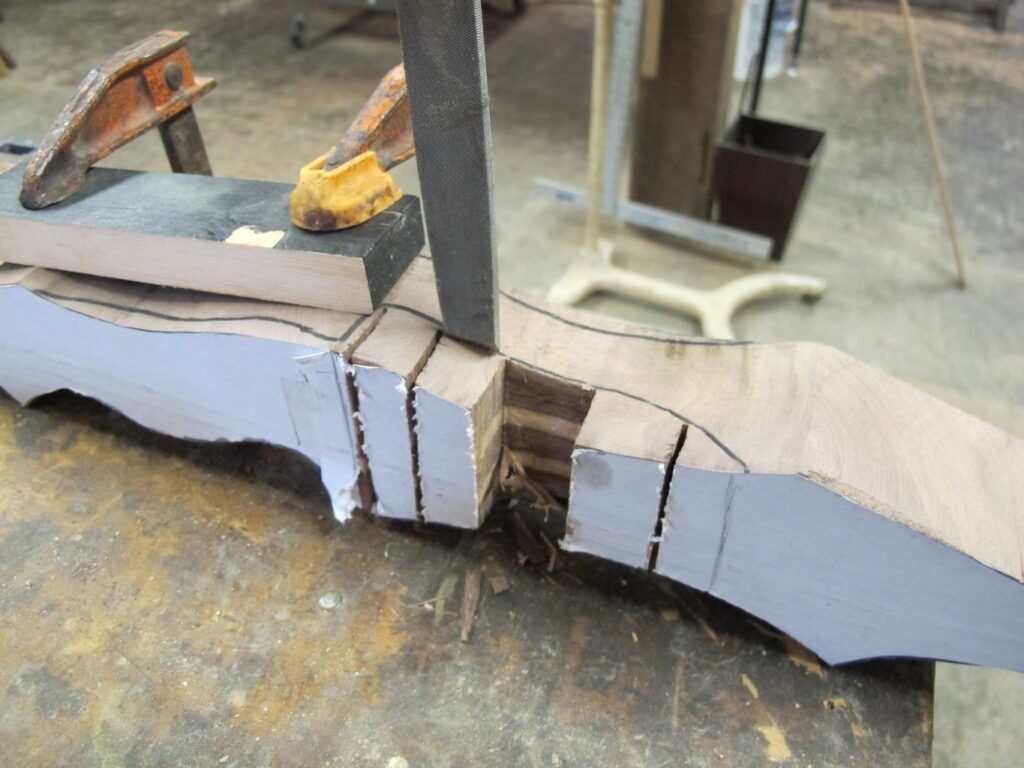
Using a saw, carefully cut the riser to the shape that you have drawn. Take your time to ensure that the cuts are clean and accurate. You may need to use a chisel to refine the shape of the riser.
Sanding the wood
After cutting and shaping the wood, it is important to sand the wood to a smooth finish. This will help to remove any rough edges and prepare the wood for finishing.
Step 3: Making The Riser
Once the wood has been prepared, the next step is to make the recurve bow riser. This involves assembling the parts, gluing the parts, carving the handle, and drilling holes for accessories.
Assembling the parts
The first step in making the recurve bow riser is to assemble the parts. This involves attaching the limb bolts and limb pads to the riser.
Gluing the parts
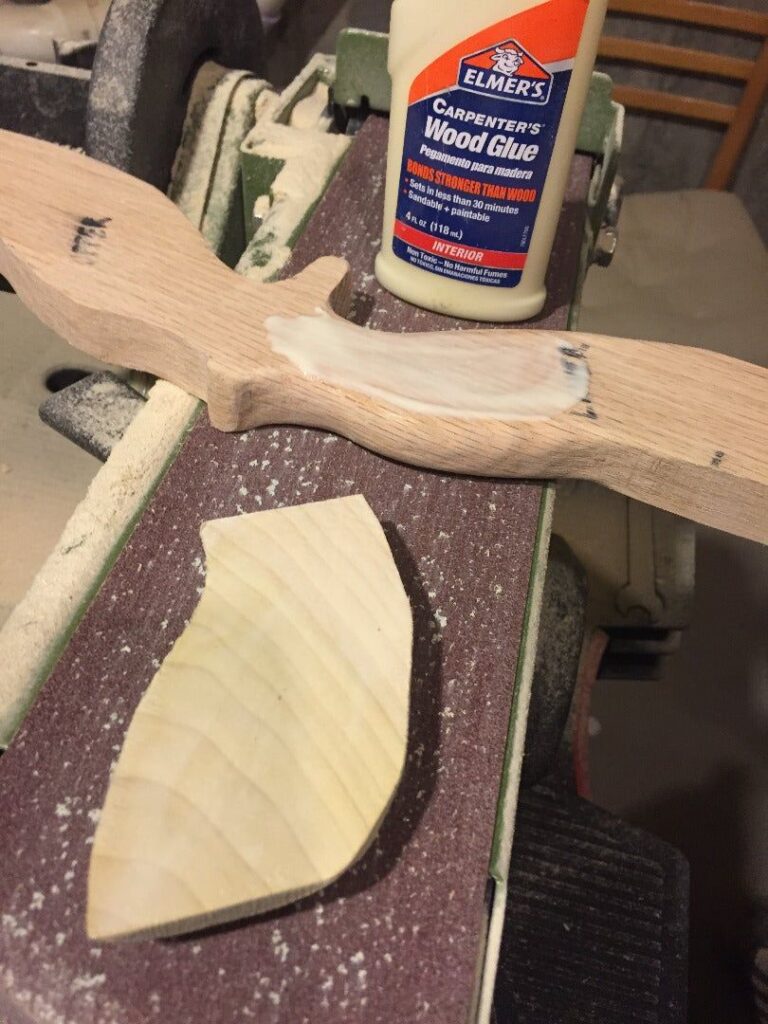
Once the parts have been assembled, they should be glued together using a high-quality wood glue. The glue should be applied evenly and allowed to dry for at least 24 hours.
Step 4: Making The Riser (cont.)
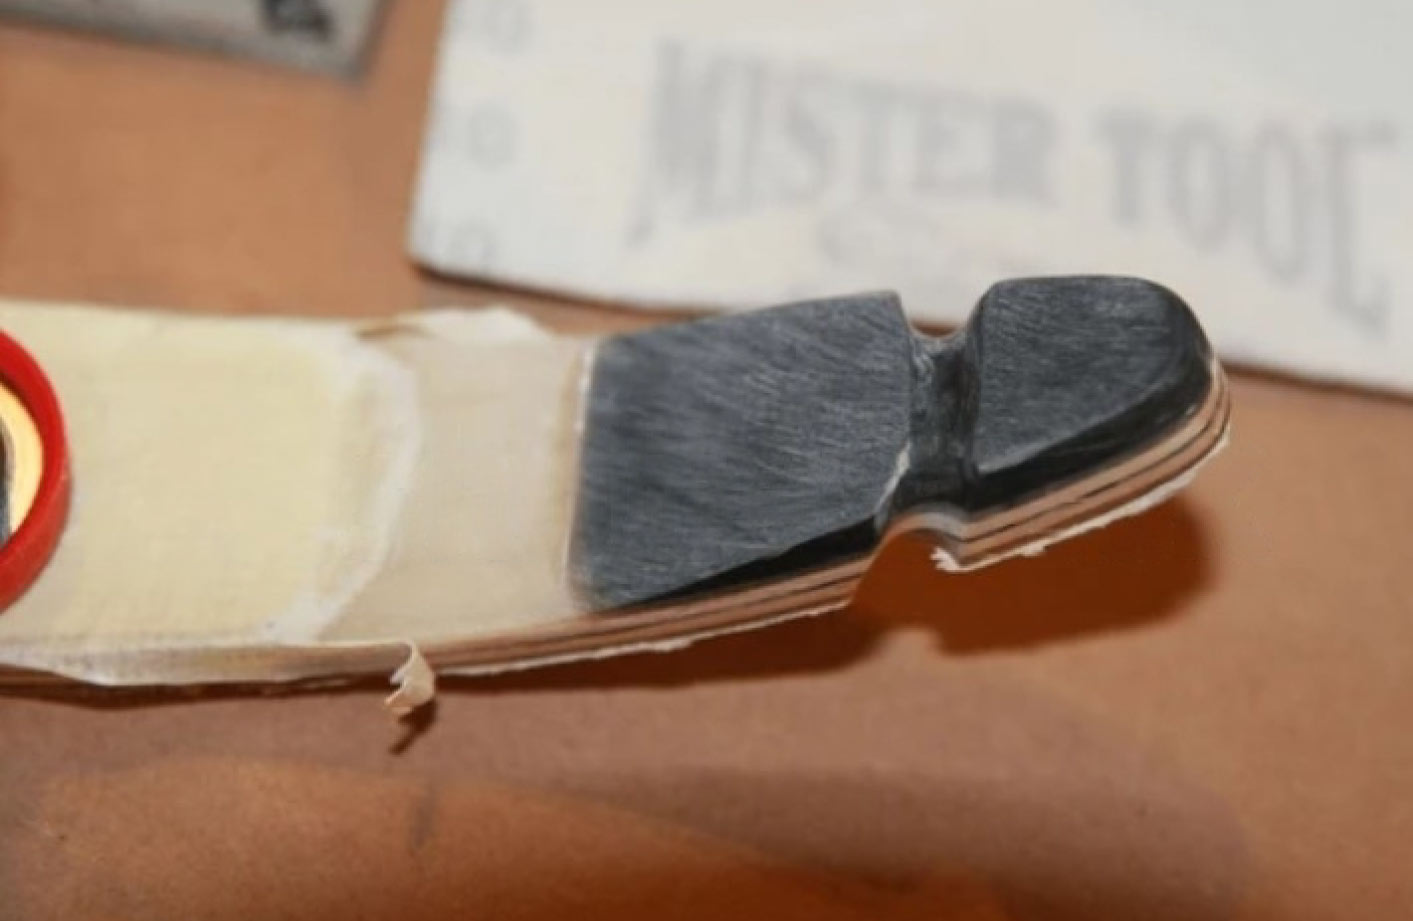
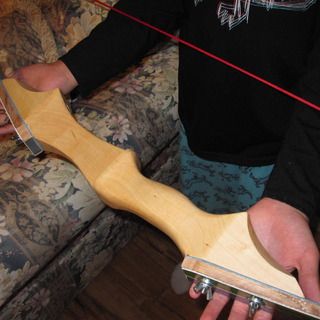
Carving the handle
The handle is an essential part of the recurve bow riser, and it must be carved carefully to provide a comfortable and secure grip for the archer.
The handle can be carved using a carving knife or chisel. It is important to take your time and carve the handle slowly and carefully to achieve the desired shape.
Drilling holes for accessories
If you plan to attach accessories to your recurve bow riser, such as a bow sight or stabilizer, you will need to drill holes for these accessories. The location and size of the holes will depend on the type of accessory you plan to use.
Step 5: Finishing The Riser
Once the recurve bow riser has been assembled, it is important to finish it properly to protect the wood and enhance its appearance. This involves sanding and smoothing the surface and applying a finish.
Sanding and smoothing the surface
The surface of the recurve bow riser should be sanded and smoothed using sandpaper or a sanding block. This will help to remove any rough edges and prepare the wood for finishing.
Applying a finish
To protect the wood and enhance its appearance, a finish should be applied to the recurve bow riser.
There are various types of finishes you can use, such as varnish or oil. The finish should be applied evenly and allowed to dry completely before the bow is used.
Step 6: Attaching The Limbs
The final step in making a recurve bow riser is to attach the limbs. This involves fitting the limbs and checking for proper alignment.
Fitting the limbs
The limbs should be carefully fitted to the limb bolts on the recurve bow riser. The limb bolts should be tightened evenly to ensure a secure fit.
Checking for proper alignment
Once the limbs have been attached, it is important to check for proper alignment. The limbs should be straight and parallel to each other, and the bow string should be centered on the riser. Any misalignments should be corrected before the bow is used.
Step 7: Testing The Riser
Before using the recurve bow, it is important to test the riser to ensure that it is functioning properly. This involves stringing the bow and shooting arrows to check for accuracy and consistency.
Congratulations! You’ve now completed this step-by-step guide and have a perfectly finished bow riser. The next steps are to find the perfect bowstring and learn how to use it.
Remember, this is just one of many ways to make your own custom archery equipment. We hope you enjoyed learning about our process and can now apply those skills in other areas of life as well!
What is The Best Technique for Cutting and Sanding a Recurve Bow Riser?
When it comes to cutting and sanding a recurve bow riser, there are several techniques that can be used.
Cutting and Shaping the Riser With The Right Tools
For cutting the riser, a bandsaw or jigsaw can be used to make the initial cuts. It is important to use a blade specifically designed for cutting wood to prevent damage to the riser.
Once the initial cuts have been made, a belt sander or hand plane can be used to shape the riser to the desired form.
Getting The Perfect Finish: Sanding the Riser to Perfection
When it comes to sanding the riser, it is recommended to start with coarse grit sandpaper and work your way up to a fine grit. This will ensure that all rough spots and imperfections are smoothed out before finishing.
A power sander can be used for larger areas, while hand sanding may be necessary for tight corners or difficult-to-reach areas.
The Importance of Patience and Safety in Making a Recurve Bow Riser
It is important to take your time when cutting and sanding a recurve bow riser. Rushing through the process can lead to mistakes and imperfections that affect the performance of the bow.
Safety should always be a top priority when working with power tools. Always wear appropriate protective gear and follow all safety guidelines provided by the manufacturer.
How do I Shape a Recurve Bow Riser?
Shaping a recurve bow riser is a delicate and intricate process that requires patience, attention to detail, and a steady hand. Here are the steps you can follow to shape a recurve bow riser:
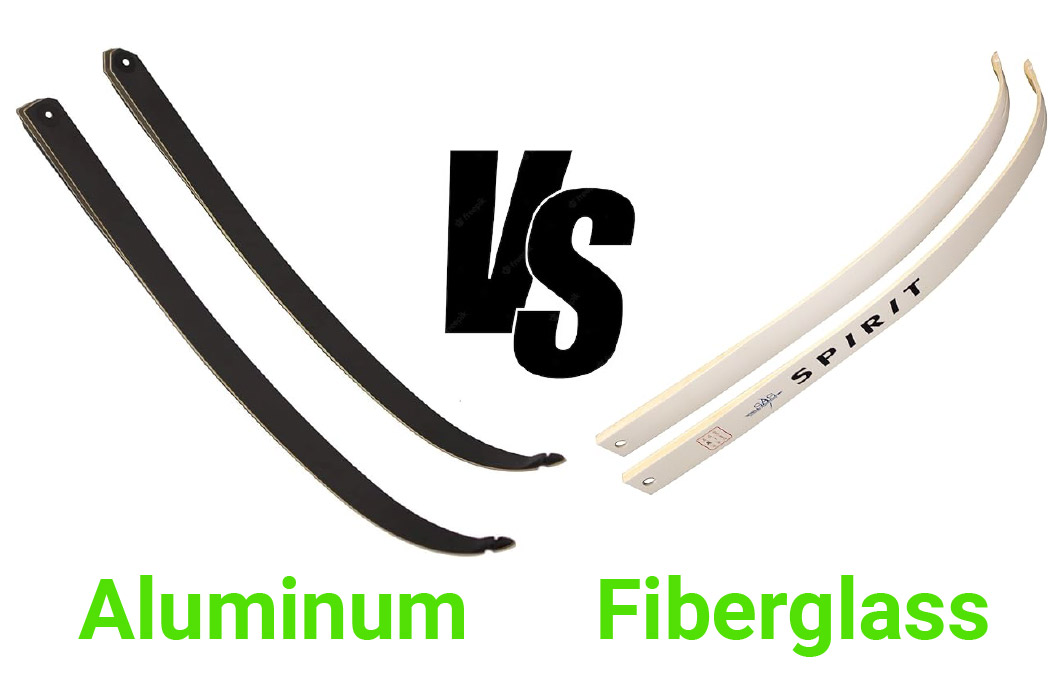
Choose the right material:
The first step in shaping a recurve bow riser is to choose the right material. The most common materials used for risers are wood, aluminum, and carbon fiber.
Each material has its own advantages and disadvantages, so it’s important to choose the one that suits your needs and preferences.
Design the shape:
Once you have chosen the material, you need to design the shape of the riser. You can either create your own design or use a pre-made template. It’s important to ensure that the design is symmetrical and balanced.
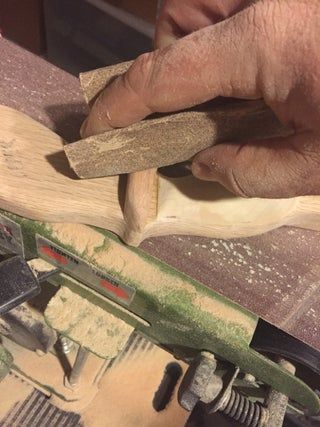
Rough shaping:
The next step is to rough-shape the riser using coarse-grit sandpaper or a file. Make sure to work slowly and carefully, removing only small amounts of material at a time. Keep checking the shape of the riser against the design to ensure that you’re on track.
Fine shaping:
After you have rough-shaped the riser, it’s time to fine-shape it. Use finer-grit sandpaper or a rasp to smooth out any rough spots and create a smooth surface. Keep checking the shape of the riser against the design to ensure that you’re on track.
Sanding:
Once you have finished shaping the riser, it’s time to sand it. Start with coarse-grit sandpaper and work your way up to a finer grit, ensuring that the surface is smooth and even.
Sanding also helps to remove any scratches or imperfections caused during the shaping process.
Drilling:
You will need to drill holes into the riser to attach the limbs. Measure and mark the placement of the holes carefully, ensuring that they are symmetrical and balanced. Use a drill bit that is appropriate for the hardware you will be using.
Hardware:
As mentioned earlier, you will need to use high-quality hardware to attach the limbs to the riser. Choose screws, bolts, and nuts that are durable and strong enough to withstand the stress of shooting.
Install the hardware carefully and securely to ensure that the limbs are attached firmly to the riser.
By following these steps, you can create a well-shaped and reliable recurve bow riser. Remember to take your time, work carefully, and pay attention to the details.
How Do I Attach a Handle to a Recurve Bow Riser?
Attaching a handle to a recurve bow riser may seem like a daunting task, but it is actually a straightforward process.
First and foremost, you need to ensure that you have the correct handle for your bow. Once you have confirmed this, follow the steps outlined below:
Step 1: Locate the pre-drilled holes on the riser.
Take a close look at your bow riser to locate the pre-drilled holes that will accommodate the handle. These holes are usually found on the sides of the riser.
Step 2: Insert the handle bolts.
Using the bolts that came with the handle, insert them through the holes on the riser. You should ensure that they are inserted from the inside of the riser and protruding outward.
Step 3: Place the handle on the riser.
Carefully place the handle onto the bolts that you inserted in step 2. Ensure that the bolts are sticking out of the handle and that they are in line with the holes on the handle.
Step 4: Tighten the bolts.
Using a screwdriver, gently tighten the bolts on the handle to the extent that they secure it in place. Do not apply excessive force, as this may damage the handle or the riser.
Step 5: Test the fit
With the handle now in place, test to ensure that it fits snugly on the riser. Also, ensure that it is properly aligned with the limbs of the bow.
What Type of Finish Should I Use on a Recurve Bow Riser?
When it comes to finishing a recurve bow riser, the type of finish you choose can have a significant impact on the overall look and durability of your bow.
There are a few different options available, each with their own pros and cons. Let’s take a closer look at some of the most popular finishes for recurve bow risers.
Stain
Staining your recurve bow riser is a popular option for those who want to enhance the natural beauty of the wood.
This finish is simple to apply and allows you to choose from a variety of colors to achieve your desired look.
Oil
Using oil to finish your recurve bow riser is an excellent choice if you want to bring out the richness of the wood and provide a good level of protection.
Linseed oil is a popular option, as it penetrates the wood to create a durable finish that resists moisture and weathering. It can take a long time for the oil to dry, so you will need to be patient when applying it.
Varnish
Varnish is a popular finish for those who want to provide a high level of protection to their recurve bow riser.
This type of finish is durable and resistant to scratches and dings, making it a great choice for those who plan on using their bow frequently.
Varnish can be tricky to apply and requires multiple coats to achieve a smooth and even finish.
What Type of Wood is Best for Making a Recurve Bow Riser?
Several types of wood are suitable for making a recurve bow riser, but the best wood depends on various factors such as strength, density, flexibility, grain pattern, and availability. Here are some options to consider:
Hard Maple:
One of the most popular choices for making recurve bow risers is hard maple. Hard maple is a dense, strong wood that can withstand the stress and pressure of a bowstring. It has a tight, even grain that makes it easy to work with and produces a beautiful finish.
Walnut:
Another excellent wood for a recurve bow riser is walnut. Walnut is a dense, stable wood that provides a smooth, comfortable grip for the archer.
It has a unique grain pattern that adds to the bow’s aesthetics and is easy to sand and finish.
Osage Orange:
Bow makers highly value osage orange, also known as bois d’arc or hedge apple, which is a rare and expensive wood. It is exceptionally dense and flexible, making it ideal for a recurve bow riser.
It has a distinct yellow-orange color that adds to the unique appearance of the bow and is known for its excellent performance and durability.
Bamboo:
While not technically a wood, bamboo is a popular material for making recurve bow risers due to its strength and flexibility.
It is also lightweight, making it a great option for those who prefer a lighter bow. Bamboo can be laminated with other woods to create a hybrid riser with the benefits of both materials.
Conclusion
Making a recurve bow riser can be a rewarding and fulfilling project for archery enthusiasts who enjoy working with their hands.
By carefully selecting the right wood, designing the shape and size of the riser, and applying a finish that suits your preferences, you can create a customized recurve bow that fits your unique needs and style.
While the process may seem daunting at first, with a little bit of patience, practice, and attention to detail, anyone can learn to make a recurve bow riser.
There are countless resources available online and in person to help you get started, from instructional videos and books to woodworking classes and workshops.
Ultimately, the key to success is taking your time, being methodical in your approach, and staying open to experimentation and learning.
Frequently Asked Question:
What type of wood is best for making a recurve bow riser?
Popular choices include hardwoods such as maple, oak, and walnut.
How long does it take to make a recurve bow riser?
It typically takes anywhere from a few days to a few weeks to complete the project.
Do I need special tools to make a recurve bow riser?
Yes, you will need some specialized woodworking tools, such as a bandsaw, belt sander, and hand chisels.
Can I customize the design of my recurve bow riser?
Absolutely! Making a recurve bow riser allows for a great deal of customization, from the wood type to the shape and size of the riser. You can even add decorative elements such as inlays or carvings.